
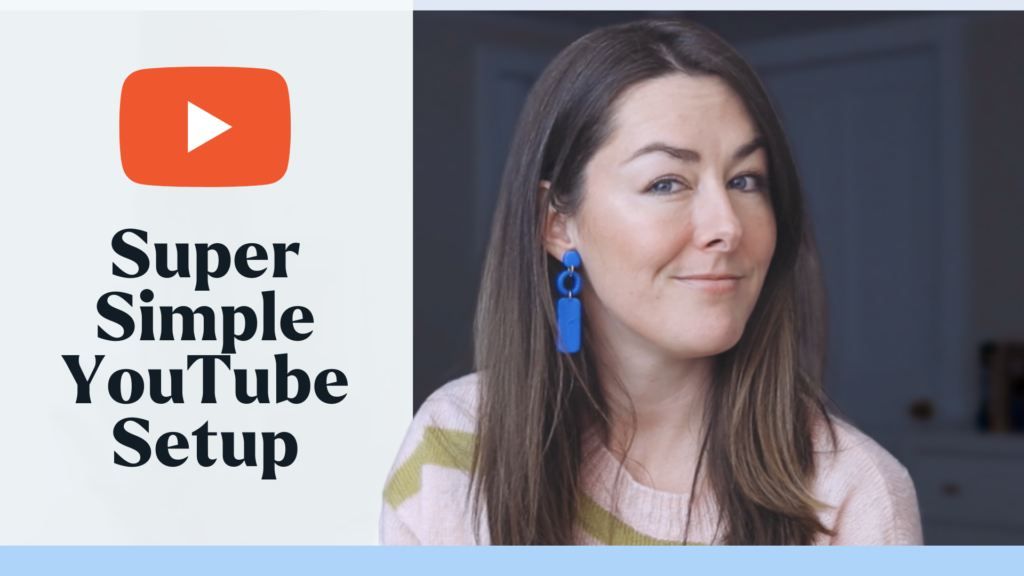
You know the age-old phrase, “work smarter, not harder?” That’s totally me for my business. And in order for me to work smarter, I have to have a plan in place. It took a few years, but I finally have a system that allows me to create my YouTube videos. Thanks in large part to my so-called Lazy Person’s YouTube Setup, I am able to be consistent with my video creation.
Transcription: 6 Steps to Repurpose Content Fast (YouTube, Podcast, TikTok, Instagram)
I am one of those people that would much rather work smarter than harder.
I’m also one of those people that has to really sit down and think about how I’m gonna do something and kind of plan it all out and mull it over before I actually start doing the thing.
For example, if you ever heard my story about how I got started making videos, it all began way back, I think it was in 2015 when I spent all of this money on lights and video equipment on Amazon, ordered them, and then didn’t actually start this channel until several years later.
I didn’t have a super doable plan for how I was going to create videos consistently. So instead of just jumping in and figuring it out as I went along, I just decided not to do it, which I don’t recommend, by the way.
It took a while, but I finally created a system for producing YouTube videos on a consistent basis. A lot of that has to do with my so-called Lazy Person’s YouTube setup, and I will link to my video all about that here.
I created all these videos, but I wasn’t actually doing anything with them. They were sitting on YouTube and my blog, which is fantastic, but there’s all these other social media platforms out there, and it can feel overwhelming to take this content and to get it on TikTok, to get it on YouTube shorts, to get it on Instagram Reels.
There were so many platforms that I wanted to be on, and since I was already creating the content, it seems like it would be easy to then create content for all these other platforms, but it wasn’t.
I needed a system for that too, and I think we finally figured it out. So I thought it would be a great time to make this video to tell you how I currently repurpose all of my video and audio content for social media.
Before we dive in, I’m Galen. I’m a web designer and content creator, as you probably could have guessed. And I love sharing what I learn as I build my business along with you.
Now I’m going to share with you my 6 step process to repurpose my content and I’m gonna be sharing with you some free and paid tools that I use to make this all possible, and it saves me a ton of time. I’m gonna include links to all of those tools down on the description. Please know that I am an affiliate for some of these tools, and if you do decide to use my link to sign up for any of these tools, I’ll be sending you a virtual cheers when I grab a lavender latte at my favorite coffee shop.
First we have step one, and that is to actually record your content. Again, I have that video that I will link in the description about my YouTube setup and how I film and record all of my videos.
I have a permanent setup, meaning that it’s at my desk 24/7, and anytime I want to record a video, I just turn on my camera, pull my mic out. It’s on a little arm on my desk, turn on my lights, and I’m ready to go. I don’t have to put together any fancy setup before I hit record.
Even though I’m a YouTuber and I’m mostly repurposing YouTube videos, this is great for any type of content that you’re creating.
If you’re going live on Instagram, record it. If you are presenting a webinar, record it. If you’re a guest speaker on a podcast, record it. Make sure you’re recording any type of speaking that you’re doing because this can be great content to repurpose into shorter form video later on.
I actually use this exact same setup to record my private podcast episodes. If you didn’t know, I have a membership community, the Local Creative Community, and inside of that, I am releasing a new private members- only podcast episode each and every week I’ll record those just like this video. It’s a little bit more free flowing. It’s not as heavily edited. But I’ll record the video anyway, even if my hair’s not perfect, or I don’t think I’m necessarily camera ready, because that content could still be repurposed into Reels or TikTok videos later that are much more casual.
Step two is to actually edit your content, and I use a tool that makes this so much easier.
I feel like it’s kind of a hidden gem in the video editing world, but it is perfect for content creators. And if you’re a small business owner who creates content, that means you too. Once I have a recording that I’m ready to edit, I will drag it into this tool called Descript, and it transcribes the entire recording for me.
Not only is this great for accessibility, if I wanted to add the transcription to my videos for anyone that’s hard of hearing. But it’s also wonderful if you wanted to repurpose this into a blog post or even put captions directly on top of your video.
Another thing that’s really cool about the transcriptions is you can search through your audio content to find when you talked about a specific topic in the content, and really easily zone in on the areas that you want to repurpose.
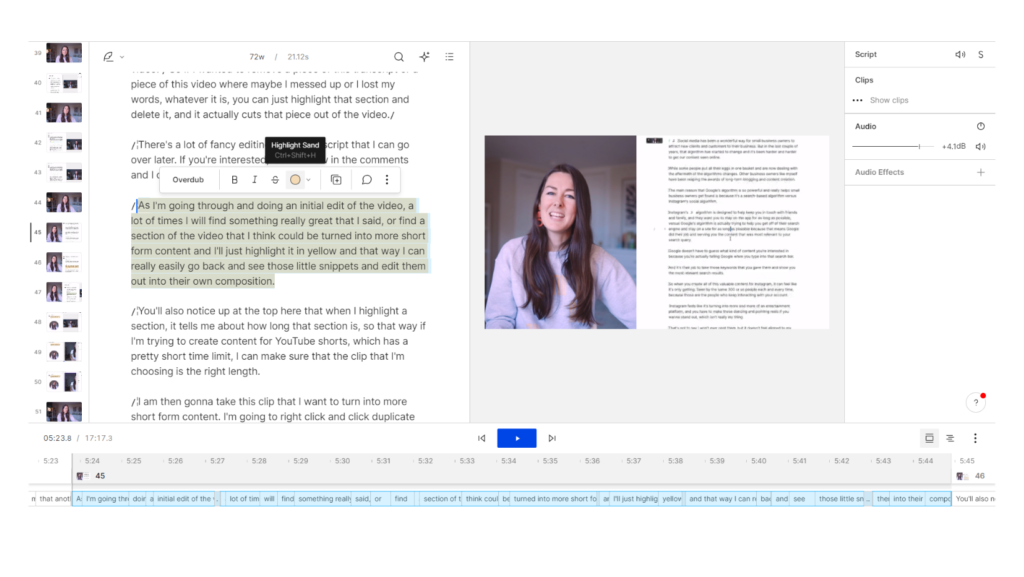
This is an example of a podcast episode that I actually recorded video for, and I’ve already gone in and edited it. I’ve added the intro audio and the outro audio down here. I have a video all about how I use Descript to edit my videos and podcast episodes, so I will link that here so you can go check it out.
But basically, you’re able to edit the transcript to edit the video. So if I wanted to remove a piece of this transcript or a piece of this video where maybe I messed up or I lost my words, whatever it is, you can just highlight that section and delete it, and it actually cuts that piece out of the video.
There’s a lot of fancy editing tools in Descript that I can go over later. If you’re interested, let me know in the comments and I can make that another video.
As I’m going through and doing an initial edit of the video, a lot of times I will find something really great that I said, or find a section of the video that I think could be turned into more short form content and I’ll just highlight it in yellow and that way I can really easily go back and see those little snippets and edit them out into their own composition.
You’ll also notice up at the top here that when I highlight a section, it tells me about how long that section is, so that way if I’m trying to create content for YouTube shorts, which has a pretty short time limit, I can make sure that the clip that I’m choosing is the right length.
I am then gonna take this clip that I want to turn into more short form content. I’m going to right click and click duplicate to, and click on new composition. And this is gonna basically move this clip to its own composition so I can turn it into short form video. We’ll click new composition here, and then at the top here, I’m gonna click this dropdown arrow and I’m gonna be able to find that new composition that I created.
Now, this isn’t a particularly great clip, but it’ll be fine for this example. In the most recent version of Descript, they actually added, uh templates, meaning that I can create templates ahead of time for what I want my short form video content to look like, then I’m able to save that. And add it quickly to any new clips that I create in the future. So for this one, I’ve already gone ahead and created some different Reels templates that I want to be able to reuse.
So I have one called Real Natural, which just basically creates a super simple vertical content. I select that and it’s gonna say, do you want to match the orientation? Basically turning it from a horizontal video to a vertical one. I’m going to choose okay, and then I’m going to double click this background here to bring up this grid and just drag it over.
That’s a great picture of my face. Drag it over so that I’m centered. And now if I hit play here, You can see it’s playing the video with the captions over top. And if I want to edit the captions, I can do so over on the right here, I’m able to make changes to any of the text here just by editing it, which is really, really handy if the transcription, for whatever reason, might have misunderstood some of the words that I’m using.
I kind of jumped ahead of myself cuz this is actually step three and that is to repurpose the content. So I am taking that one piece of longer form content and I’m pulling out all of the different snippets that I want to use for shorter form content.
Step four is to organize the content. So I go through and I will actually export all of this, double check the settings. I’m gonna export all of this to a folder on my computer, and then I’m going to add all these individual clips as well as the long form content, if I plan on using it again. I’m going to load all of that . Into Notion, which is my project management app, and I also use it as a place to back up all of my video content in case my computer ever got destroyed or the content got lost somehow. I love knowing that all of it is updated inside of Notion.
If you’ve been following me for a little while, you know I’m a huge Notion fan and I’ve actually got a video already made about my Notion Content calendar that you can check out. I’ll show you in a second how I actually load everything into Notion so that I can access it later.
This is what my current content calendar looks like in Notion. You can see in here, I have all the emails, the blog posts, the YouTube videos, and all of the Reels that I have going out every week. We can click on one here as an example. I have the caption here, and then I actually drag in the video as well because again, I love that it’s backed up inside of Notion in case anything were to happen to my computer.
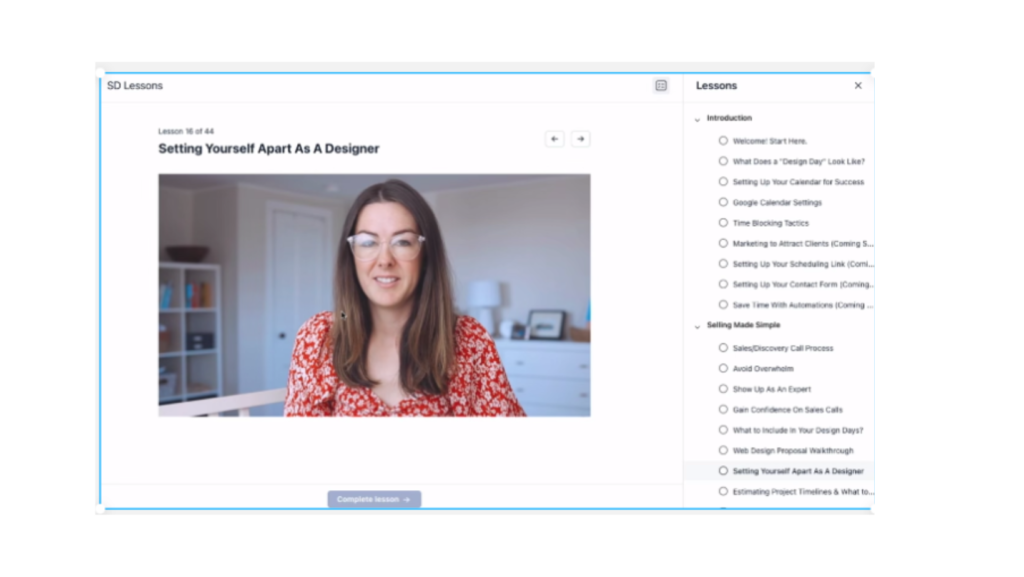
This particular piece of content was actually recorded initially as a podcast episode, and I recorded video along with it just to give me the opportunity to repurpose. The podcast is hosted through Hello Audio, which allows me to make it a private podcast, meaning it’s only for my private community members, people who are part of the Local Creative Community, or who are inside either of my signature programs, Creative SEO and Simplified Designer.
This is a great opportunity for me to tell you a little bit about Circle, which is the community platform that I use to run and host my online educational programs. Circle is an amazingly powerful tool that for me, helped to replace Facebook Groups. For all of my paid courses and programs. I was using Facebook Groups in the past as a way to stay in touch with students and go live and release new resources. But now I can do all of this from within my Circle community.
Circle also recently launched a new feature for hosting courses, meaning that you can actually have your courses and programs directly inside of your community so that everything is in one place.
I love that my students and members can now have one single login to get access to all of the lessons from within my course. They can watch videos, they can download PDF resources, they can connect with other members, they can DM or direct message other members, and I can go live on video directly within that community. Or host live rooms if we want to get together and provide feedback or cowork. There are so many options and they are launching new features all the time.
I’ve been a longtime user of Circle since right around when they first launched, and it’s been such a pleasure using their product, seeing all of the updates, so thank you to Circle for supporting this channel and sponsoring this video. If you are somebody who wants to launch a community or an online course around your business, make sure to check them out in the description below.
Once I have everything organized, backed up in Notion, and all of the captions written, it’s time to actually publish the content.
This is step number five, and you might be thinking, that’s a lot of work to take this one piece of short form content and to push it out on all these different channels, but I have a trick. I actually just publish it on one channel and then I have a tool that helps me push it out to all the rest.
First, I’ll publish and schedule the long form video content if I haven’t already, and next I will publish just one piece of short form content, and I usually start with TikTok. I don’t know why. I just like TikTok for being the first place that I schedule my content to. It doesn’t have a ton of restrictions when it comes to the length of my videos, and it just works really well.
So I will download the video content directly from the Notion App on my phone, or I’ll download it to my computer and just airdrop it to myself since I’m an Apple user. Then I will copy the caption out of Notion, put that into TikTok, upload the video to TikTok and hit publish.
If you’re not a TikTok user, that’s totally okay. You can pick a different platform as your primary platform for the short form content, and then I’m gonna show you how I distribute it to all of the other channels that I want to be on.
This is step number six, where I take that one piece of short form content that I published on TikTok, and I distribute it to all the other platforms that I want to show up on. For me, that is YouTube shorts, Instagram Reels. I post it to Pinterest, and then I’ll also back it up one more time on Google Drive just to have it saved somewhere.
If you can’t tell, I’m a big fan of having things stored in multiple places, just in case you never know with technology.
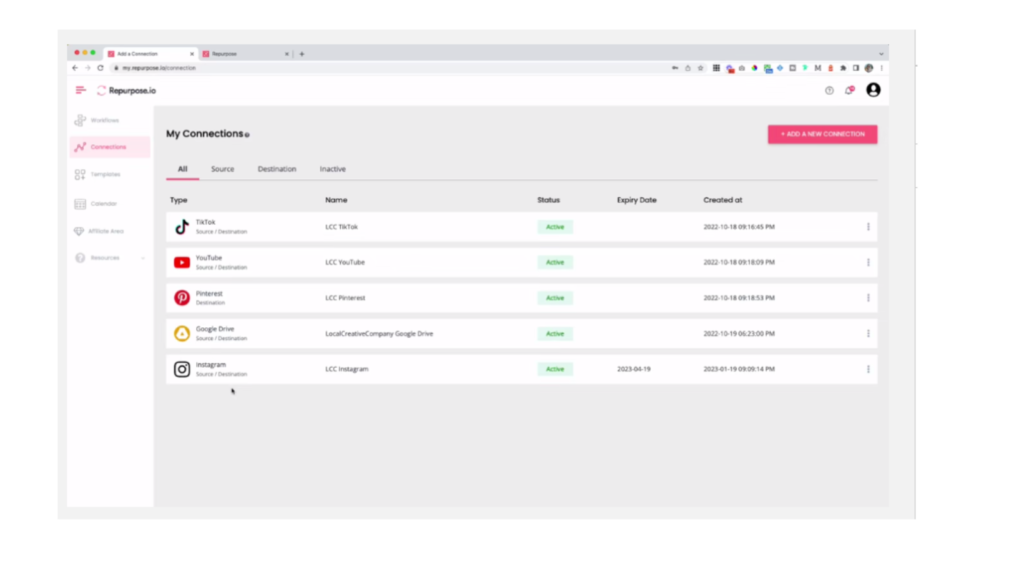
Inside of this tool called Repurpose, and I’ll include a link in the description below. If you want to test it out for yourself for free with a free trial, that link will be there for you.
First, you set up all your connections, meaning all of the places that you either want to pull content from, or post content to
So for me, again, TikTok, YouTube, Pinterest, and Instagram. Then you can come over to workflows and you’re going to create a new workflow and you’re going to choose where you’re pulling content from and where you’re sending it to, and you need one workflow for each platform that you want to post content to. And as I mentioned, I start all of my content. I post it for the first time to TikTok, and I pull it from TikTok to publish on other platforms.
For example, let’s look at this workflow on the bottom here. We’re going from TikTok to Instagram. I’m going to click view content, and it is going to pull in all of the content that I’ve ever published to TikTok, and I can click “fetch content” if for some reason a recent post isn’t showing up here.
You can see I’ve already published quite a bit of this content directly from TikTok to Instagram. Here’s another one that I have not published yet. I can click publish here. It’s going to let me edit the caption. If I want to change the caption at all, it pulls in the one from TikTok, but maybe I want to edit it, maybe I want to bump those hashtags down a few lines or add a few new hashtags. And then I’m able to either publish now or schedule this so I can come into a calendar.
And I can schedule this for any point in the future. Pick an exact day and time and schedule this content out.
So sometimes I’ll post a bunch of TikToks all at once instead of spreading them out because I don’t think the TikTok algorithm cares as much if you push everything live at the same time versus scheduling it out.
But for Instagram, I really like to kind of stagger the content so we don’t have too many Reels going live at the same time. So I will post them to TikTok and then schedule them out on Instagram over the next few days to a week.
If I go back to the workflows page here, you can see I’ll do the exact same thing for Pinterest. So I’ll post these as video pins or idea pins directly to Pinterest, which is a great way to get more eyeballs on my content without having to do any more work.
One more thing I want to show you. If you are not a Descript user and you can’t easily create a ton of shorter compositions or clips from that one main long video, Repurpose can actually do this for you. So if I create a new workflow here, we’ll have it take the content.
Let’s actually take this content from YouTube. That’s fine. And then we want to upload a video. We want to do clips instead of the full video. So this is taking a long form video and turning it into clips. We’ll hit next and let’s have this content. Just go to Instagram as an example. Instagram Reels done.
Now I can head into this test workflow that I just created. I’m going to find a longer form video that I created here. Here it is, and instead of publishing the content directly, I can now come into Repurpose and actually create the clips right here directly.
I can edit the snippet down to take a certain portion of the video, test it out to see what it looks like, and then I can actually create multiple snippets from this one video.
Once I have those snippets created, I’m able to publish them independently. So rather than trying to publish a full length YouTube video to Instagram, I can come here and create short form versions of that for all of the other social channels that I’m on.
Did you find this video helpful or do you have any more questions about all of the different tools I mentioned here? Let me know in the comments below. I would love to hear from you.
Thanks so much for watching. Don’t forget to subscribe and I’ll see you in the next video.
My 6 Step Process to Repurpose My Content
I love creating videos for YouTube and my blog, but I also know how important it is to get my content on all the other social media platforms. It’s not as simple as you would think to get content on TikTok, YouTube Shorts, or Instagram Reels. But, true to my way of doing things, I figured out a system to repurpose all of my video and audio content for social media. And I’m here to share it with you, so you can also work smarter, not harder, too.
1. Record Your Content
It all starts with recording your content! I have a permanent setup to record my YouTube videos in my home office. Anytime I want to record a video, all I have to do is turn on my camera, pull my mic out from its arm on my desk, and turn on my lights. There is no fancy setup to put together every time.
This is great for any type of content, not just YouTube. If you’re going live on Instagram, presenting a webinar, or a guest speaker on a podcast, record it! All of this is great content to repurpose into shorter-form videos. Even though it’s a private, members-only podcast, I can use little snippets of each episode to make TikTok videos or Instagram Reels.
2. Edit Your Content
Once you have recorded whatever video you’re creating, it’s time to edit. I use Descript, which is kind of a hidden gem in the video editing world. It’s great for content creators and makes editing so much easier.
After dragging your project to Descript, it automatically transcribes the entire recording. You could add the transcriptions to your video for accessibility or repurpose it into a blog post. You can also put the captions directly on top of your video. Another great thing about the transcriptions is you can actually do a search in Descript. So, you can find when you talked about a specific topic to find the parts of the video you want to repurpose.
Check out my review of Descript here.
You can highlight portions of your transcription with your cursor and delete it, and it actually cuts that piece out of the video as well. Editing your transcription allows you to fix where Descript didn’t understand what you said. To easily see what content you want to repurpose, you can highlight sections in different colors.
3. Finding Clips to Repurpose
Descript also tells you how long a highlighted section is, which is great to make sure clips are short enough for social media. You can turn highlighted clips into their own composition and then edit them. Descript has a new feature where you can create templates, so you save how you want your short-form video to look like. I have a template called Reel Natural, which has captions that look very similar to the captions that Instagram has.
4. Organize the Content
After I create all the short-form videos or clips, I will export them and save them in Notion, my project/content management app. Not only is this good for organization, but it also ensures my work is backed up in case my computer crashes or files get lost.
All of my created emails, blog posts, YouTube videos, and short-form videos are stored in my Notion Content Calendar. I also upload my private podcast video and audio which is for my private community members or people who are inside of either of my signature programs, Creative SEO and Simplified Designer. I use Hello Audio to host my private podcast, but I still always upload the episodes into Notion. I try to sift through all the content I’ve created to find relevant video or audio snippets that can be used for TikTok or Reels.
I can’t tell you about my educational programs without telling you about Circle. It is an amazingly powerful tool that helped me replace Facebook Groups. I can stay in touch with students, go live, and release new resources all within my Circle Community. Circle also just launched a new feature for hosting courses, so now all of my courses and programs can live in one place.
This means my members have one single login to get access to their lessons, videos, and PDFs. And they can connect with other members, and message me and other members. Circle is launching new features all of the time. I have been using Circle since they first launched, and it’s been such a pleasure using their product. I highly recommend Circle to anyone who wants to launch a community or online course. Thanks to Circle for sponsoring our Square Summit event last year and for supporting the blog!
5. Publish the Content
It seems like a lot of work to schedule and publish one piece of short-form content, but don’t worry. I have a tool that helps me easily schedule all of my video content for each social channel.
I usually publish my short-form video to TikTok first because posting times don’t matter as much and you can publish several pieces of content at once. But if you don’t use TikTok, you can pick whatever platform you want to start.
6. Distribute Short Form Content to All Platforms
After you publish your short-form video to one platform, it’s time to get it uploaded to all the other platforms you want. For me, that’s YouTube Shorts, Instagram Reels, and Pinterest.
I use a tool called Repurpose. You set up all of your connections to your social media channels. You then take the one piece of content you published and create a workflow to get it to the other channels. You can either publish immediately or schedule for an exact day or time. This is such a time-saver!
Another great thing Repurpose can do is create short clips for you. If you don’t use Descript, you can upload your longer-form content, and Repurpose can turn it into that short-form content you need for social media.
If you have a YouTube channel, podcast, or host webinars, don’t let this valuable content just sit on one platform or one part of the web. The six-step process I’ve created and the tools I mentioned will help you easily repurpose your hard work. Let me know in the comments which platform you will start with to get my eyes on your content, and ultimately, grow your business.
Galen Mooney is the founder of Local Creative, a boutique web design studio crafting elevated websites for small business owners and creatives with a focus on connection, clarity, and growth. With over a decade of experience in design and SEO, she’s partnered with hundreds of creative brands to build custom Showit, Squarespace, and WordPress websites that build trust and momentum over time.
