
In my latest video, I go through some easy SEO tips for Showit customization. Although this list isn’t comprehensive, it does give you some quick and easy tips that you can implement right away to improve your Showit website’s ranking in Google search results. You can check out the video here.
If you’re a creative business owner who uses Showit for your website, you already know how amazing its customization features are. However, with great customization comes some complexity, especially when it comes to optimizing your website for search engines like Google.
Transcription: Showit SEO: 5 Super Quick Tips to Rank Your Site Higher in Google
Today I am going to run through some super quick tips to help you rank your Showit website higher in search engines like Google.
Now this is not going to be an all-encompassing SEO tutorial, but it is going to have some really quick tips that you can put in place right away for your website.
Because who’s got time for SEO? Other than me, because I’m a web designer and that’s part of my job, so I’m going to help you make SEO even easier for your website too.
Hi, I’m Galen and I love to design websites for creative business owners and I also really love Showit.
It’s a super cool platform, and the design settings behind the scenes make it really easy to customize.
The downside is with all of that customization comes a little bit of complexity when you’re trying to figure out what settings to change to improve your SEO.
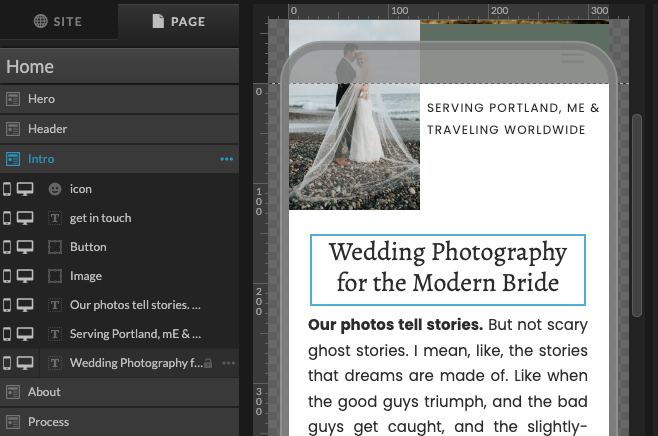
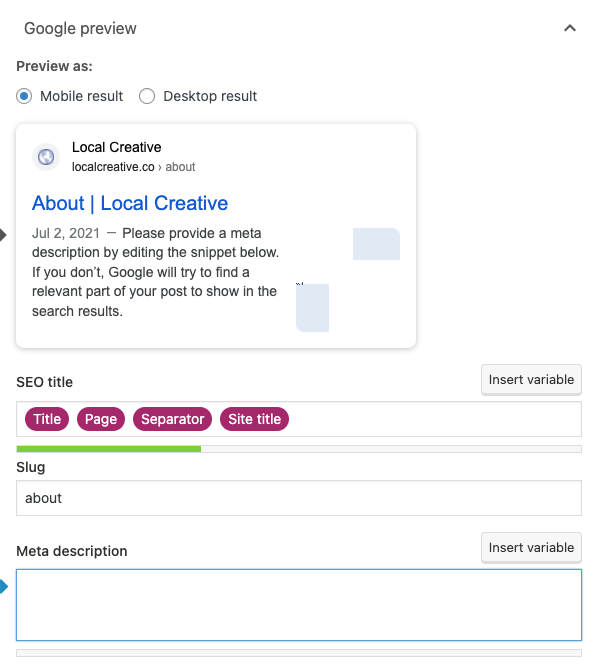
If we dive into the back end of Showit, I have the site tab pulled up here. I’m going to click on the homepage because this is probably the most important page when it comes to SEO if you are a creative service-based business owner. I’m going to click on home. Come over here to SEO settings, and here you’re going to see the page title and the meta description.
This is what will typically show up in the search engine results page for Google. So if somebody types in the type of business that you have and your location, ideally you would show up there. The page title is the heading for your listing, and the meta description is what comes underneath that.
For your page title. It should be about 60 characters and it should say your brand name, what you do, and where you do it, so your primary location as a business.
Your meta description isn’t as important for showing up in search, but it is one of the first impressions that someone’s going to have of you. They’re going to read that description before they click over to your site, so it is important to have something there that is going to really entice people to visit your website.
Now if you have your homepage as a blog template, which I actually recommend, and I’ll have to make another video about why you would want to do that and let me know in the comments if that’s something that you’d be interested in.
But if you have your homepage as a blog template, you’re actually going to edit all of the SEO settings directly inside of WordPress using an SEO plugin of your choice.
The nice thing about having all of your primary pages actually be blog templates is that everything is under one site map. Rather than having one site map for Showit, and then another one for your blog over on WordPress.
I also like being able to use some of the more advanced SEO settings that come with some of the WordPress plugins that I typically use.
But like I said, if you have your homepage or any pages in the pages section over here, you’re going to want to edit the SEO settings by clicking on that page, going to SEO settings and putting in your page title and meta description there.
if these are left blank, that’s going to be the first thing you want to check off your to-do list today.
Next, you’re going to want to update the order of different elements within a canvas on the page. We’re going to switch to the page tab over here, and on the left you can see all the different canvases that make up this particular page.
Let’s click into the header canvas here, and if I look at the different elements on the right and click them, you can see there’s sort of in a random order.
For ease of use Showit typically recommends that you order the elements here in the order that they actually show up on your page within the Showit editor. But the problem is that’s not how they show up in the HTML and the HTML behind your site is what Google sees when they determine the most important content on your page.
So what you have shown here from bottom to top inside of the Showit editor actually ends up appearing from top to bottom in the eyes of Google.
So in this section as an example, we’re going to put the most important header, the largest text here at the bottom, and then we’re going to order everything else from bottom to top from there. So we’re going to put the most important text.
Keep going up in hierarchy. So we have the most important text, the second most important, the third and most important text. And it’s in the order that it would typically be read in most cases. So we start with the heading, then you read the subheading, then you read the paragraph. So now we’re going to start at the bottom with the main heading, the subheading and the paragraph.
You want to go ahead and do this for every canvas on the page.
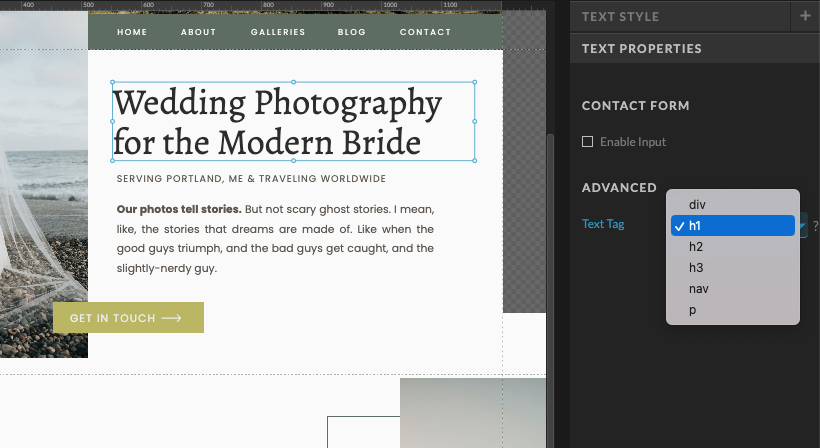
Next we’re going to update the text tags inside of Showit. If I click on the heading here and I come down to text properties, you’re going to see the option to add a text tag under advanced. This really shouldn’t be an advanced functionality, you should be doing this on every single page of your website because it’s so important for SEO.
Typically the largest heading at the top of your page is going to be the most important content on that page. That is this heading here. We are going to switch this to an H1, a heading one, and you really only want one of these per page. So if you have multiple headings across your page set to H1, make sure to change all of the other ones, so the first one, that most important heading, that is going to be your one and only H1 for the page. Then beneath that we have a subheading here. I’m going to make this an H2. And again, we’re working in hierarchy here, so it should go H1, H2. And then H3 if we have a subheadline beneath an H2.
Then for this text, this is just a paragraph here, so we’re going to make sure this is set to P.
And then for buttons, we are going to set this to a div. Unless your button text is giving Google any sort of context as to what your page is all about, I like to set this to a div just to show that it’s not quite as important.
For the main navigation on your site, you’re going to want to make sure that you set these to nav so that Google knows that these are the primary pages of your site.
Next, let’s talk about images and how you can optimize them for your website. Showit actually compresses your images for you once you upload them to the platform, but I like to take this a step further and compress them first just to make sure they’re as small as possible while still appearing high quality when they show up on your website.
Compressing your images is going to allow your website to load a lot faster, which is really important considering not everyone has perfect wifi, and Google is going to look at the page speed in determining how well to rank your site.
So how do I compress my images? There are two main tools that I recommend. One is called JPEGmini and the other is called ImageOptim, which is a free tool for Mac.
They both work really well to shrink down those file sizes before you import your images to Showit.
For ImageOptim, I just open the program and I drag over a bunch of files from my desktop. It will automatically compress the images to reduce the file size. These ones here had already been compressed, but sometimes I’ll see savings of up to 80%.
My favorite part about this is you don’t really visually notice a big difference in your images, but the file size can be significantly smaller.
I also like that there’s no importing or exporting files from ImageOptim. You just drag the images in, it resizes them, and it saves them back where they were originally.
I will say if you do have some really high quality files that you plan on using to print, at some point you might want to make sure that you have a duplicate copy of them saved because again, this will replace the initial version. It will replace it with the smaller version, but you won’t really notice a difference for web.
The next thing you’re going to do is rename your images. So I’m going to open up the file on my desktop where those images are. I’m going to click into each image, and I’m going to rename this image based on what’s actually in the photo.
These ones in particular are just some random stock images I found on Pexels, so I don’t have some great names for them, but this one looks like a beach, so I might put something along the lines of, Tropical beach San Diego, just making that one up.
And then you want to use hyphens between each word in your image file name, because Google will see those hyphens as spaces.
Now that you’ve compressed and renamed your images, you can go ahead and upload them to Showit directly.
The reason that you want to rename your images before you upload is that once they’re in your Showit library, you actually can’t edit the file name.
You can, however edit the description, which is also your alternative text.
Adding alternative text is great for accessibility because it helps people who use screen readers better understand what your site is all about. In this field, you want to add a short description of the image that includes some of the five Ws, the who, the what, the where, when, and why of the image.
Thanks so much for watching. If you need help with your show at website, I’m going to include a link in the description below so you can reach out and get in touch.
Also, I know you’re going to love the video that I have all about Showit Design Hacks that I will include here next. See you next time.
1. Optimize Your Page Title and Meta Description
Your page title and meta description are essential elements that Google displays in search results. Your page title should include your brand name, what you do, and your primary location as a business. Keep it short, about 60 characters, to ensure that it displays correctly.

Your meta description is the text that appears beneath your page title, and it’s important to have a description that entices visitors to click through to your website. While not as crucial as the page title, it’s still an important factor in attracting visitors to your site.
2. Organize Elements in Each Page Canvas
In Showit, a page is made up of different canvases. Organizing the elements within each canvas ensures Google will recognize the most critical content on your page.
Showit typically recommends organizing the elements in the order that they appear in the editor, but this isn’t the same as how they’ll appear in the HTML code behind your site. Google reads your website’s HTML, so order the elements from bottom to top. This ensures that the most important content appears first.
3. Use Text Tags
Text tags are a crucial element of on-page optimization. The largest heading on your page should be an H1 tag, as it’s the most important content on that page. You should only have one H1 tag per page. If you have multiple headings, make sure to change them to H2 or H3, depending on their importance and content hierarchy.
4. Optimize and Resize Images
Even though Showit does compress images, I like to compress them before I add them to Showit, just to make sure they are as small as possible. Large, bloated images can really slow down your site and create a bad user experience for your website visitors. There are two tools I recommend to compress your images: JPEGmini and ImageOptim
It’s also important to rename your images based on what appears in the photo. You want to use hyphens between each word because Google sees those as spaces.
An example image file name might be “beach-wedding-photography-boston.jpg” or something even more even more specific like “wedding-couple-walking-beach-capecod.jpg”
Once you upload your images to Showit, adding alternative text is a great way to make the images more accessible. Make sure you use the 5 Ws- who, what, when, where, and why.
Your alternative text can be more of a sentence that describes the image. This is helpful for people who use screen readers to consume your content and want to understand more about the images on your page.
5. Use Blog Templates in Showit
Creating pages as “blog templates” instead of Showit pages is an excellent way to take advantage of the powerful SEO settings and plugins on WordPress. When you use a blog template, you can edit all of the SEO settings directly inside WordPress using an SEO plugin of your choice. I recommend Yoast or SEOPress.
This is beneficial because everything is under one sitemap, rather than having one site map for Showit and another for your blog on WordPress.
Feeling overwhelmed by Showit SEO?
Don’t be! Just try to do one thing at a time. SEO can be complex and time-consuming, but these quick tips will help you improve your Showit website’s search rankings. If you want to become even better at designing websites on Showit, I have a whole post dedicated to Showit Design hacks, to make you love the platform even more.
And if you need more help, make sure to check out my SEO Power Hour or hire me for custom website design.

Galen Mooney is the founder of Local Creative, a boutique web design studio crafting elevated websites for small business owners and creatives with a focus on connection, clarity, and growth. With over a decade of experience in design and SEO, she’s partnered with hundreds of creative brands to build custom Showit, Squarespace, and WordPress websites that build trust and momentum over time.
