
Before we dive in to creating workflows in Flodesk, let’s talk about why you need to be building an email list. Email marketing is essential to running a successful creative business because it helps remind existing clients about your services while also being able to maintain a relationship with them overtime.
Using an email marketing software, like Flodesk will allow you to build a targeted list of followers and automate how you communicate with your audience.
For more information on email marketing strategy for creatives, you can read my personal review of Flodesk here.
What is a workflow?
A workflow is a series of emails or actions that a new subscriber will go through based on the time and date they join your email list.
The benefit of having a workflow is that subscribers will never miss important content since all subscribers receive the same email depending on how you segment your audience. It can also help turn new subscribers into loyal clients because they are consistently hearing from you.
The entire process is automated, so once it starts, your subscribers are receiving emails without you having to press “send.” Workflow emails can introduce people to your brand story, your business values, the services you offer, and client testimonials. There is no limit to the number of emails you can send in a workflow.
How to create a workflow in Flodesk
Creating a workflow in Flodesk is an easy process to follow.
When you log in to Flodesk, at the top of the navigation bar, there is a “workflows” tab.
-
To create your first workflow, click on the “workflows” tab.
-
Click the “Create New” button.
-
Choose a template or start from scratch.
-
You will then be brought to your workflow design page where you are able to customize your the emails and actions inside your workflow.
A workflow is made up of the following components…
You can create a new email, which will allow you to pull from your “favorites” or you may duplicate an existing broadcast email. You can also create a new email altogether!
All emails in Flodesk are completely customizable. You can drag and drop to add elements like images, links, buttons, your Instagram feed, and even custom layouts with unique fonts.
Don’t forget to update your subject line and preview text. It’s hard to miss, but very important.
Your subject line should give a good idea as to what the email is about while trying to be catchy and interesting. The preview text should go along with your subject line and give a bit more detail. You can add as many emails as you want to a workflow.
Make sure you add time delays between each email so that your subscribers don’t receive them one right after the next.
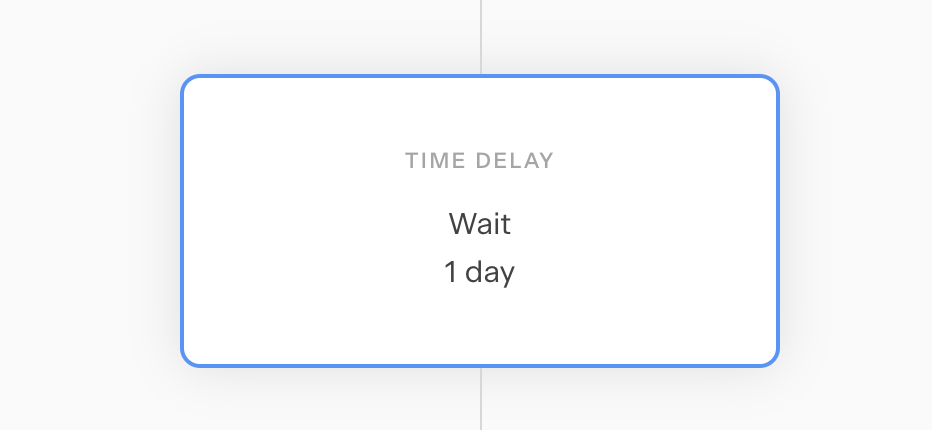
Time Delays
This will tell Flodesk to wait before moving to the next step and it’s the most powerful tool inside of workflows. This is essential if you have multiple emails within your workflow. If there is no time delay set, the emails will be sent back to back.
If someone signs up for your email list at 1 AM, and you want to add a time delay of 24 hours, you should also add another time delay for a specific time of day (during normal working hours, for example) so that people are more likely to open your next email.
You can use multiple time delays in a row and the options are…
-
wait a certain period of time (minutes, hours, or days)
-
wait until a certain day of the week
-
wait until a certain time of day
-
wait until a specific day of they year
A time delay won’t allow your workflow to move onto the next step until the first time delay has completed, so make sure you have them in the right order.
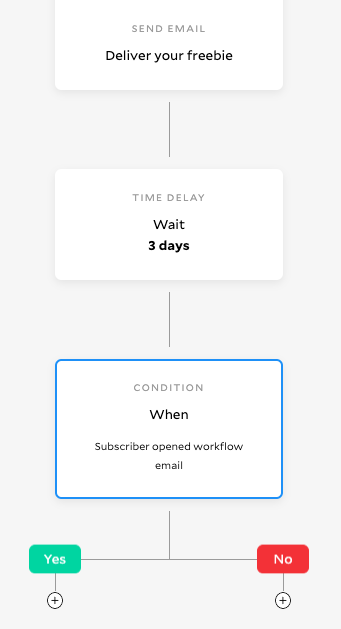
Conditions
Conditions allow you to take action based on the subscriber activity or data. The conditions you can choose from are “take action if”: subscriber is in segment(s), subscriber opened workflow email, subscriber has clicked a link, or if a field matches…
You want to make sure you’re adding a time delay in combination with your condition if you’re going to choose the “subscriber opened workflow email” or the “subscriber has clicked a link” option.
If you don’t, the subscriber won’t have a chance to open the email or click a link before it moves to the next step.
If you create a “subscriber is in segment(s)” condition, you can choose more than one segment. Flodesk will consider if your subscriber is in one of those segments “OR” the other one, meaning that if you choose multiple segments the condition will take action if the subscriber is in any one of those segments (not all of them).
If you delete a condition, it deletes all the emails underneath it. If you need to move an email or delete a condition, be sure to save the emails below it as a “favorite” and create the email again under the other side.
Hint: You can always hit the “undo” option at the bottom right of the workflow editor page if you accidentally delete anything…phew.
Resend an email to unopens
You may want to create a workflow that resends an email to someone who didn’t open it the first time. You would use a time delay after the email was sent and then use the “subscriber opened workflow email” condition to resend the email based on the subscribers activity.
If you need to duplicate an email, save it as a “favorite” first using the heart icon, and then create a new email using that as a template.
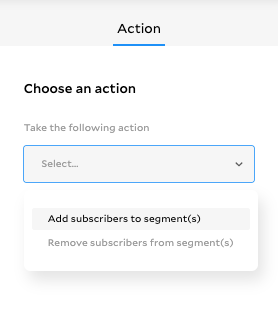
Action
Flodesk will most likely add more to this feature in the future, but as of right now you may add or remove subscribers from a segment either at the end of workflow, or in the middle by using a condition to filter out which subscribers you want to move.
You could combine this action with the “subscriber has clicked a link” condition to move certain subscribers into a different workflow.
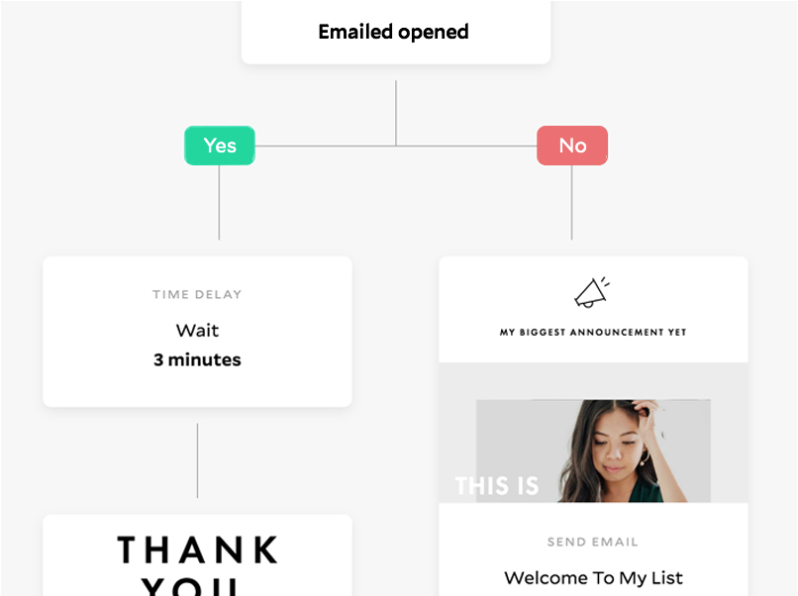
Workflow example
Here is an example of what a workflow in Flodesk might look like…
This is an example of a very basic “nurture sequence” or a workflow that helps a subscriber or potential client get to know you and your brand.
Email #1: Welcome email + deliver your opt-in freebie
Email #2: Check-in & introduce yourself
Email #3: Share a client win, a testimonial, a story, tease a promotion
Email #4: Talk about what you have to offer & tell them how they can work with you
Email #5: Reminder about working with you and share another testimonial
You could set this up in multiple ways, one email per day, one every other day, or one per week. The amount of time between emails doesn’t have to be the same across the board.
You need to think about what is going to be a good fit for your audience and what they’re used to. You can always test what will work best for you.
If you are experiencing a lot of people unsubscribing or low email open rates, try to switch it up.
It’s important to remember that people are always going to unsubscribe and that you should focus on the people who actually want to be on your email list.
Workflow tips
Every time you edit a workflow, it gets paused. Make sure to re-publish when you’re done editing. It can be easy to make a simple change to your workflow and forget that you didn’t turn it back on and then your subscribers are stuck in the middle, or worse maybe they aren’t receiving any emails at all.
You can manually add or remove subscribers from a workflow by clicking on the three little dots when you hover over a workflow in your main dashboard and click “add subscribers” or “remove subscribers”. You can also go to the “subscribers” page within Flodesk and add an individual to a segment to trigger a workflow.
Keep in mind subscribers won’t receive more emails once they’ve hit the end of your workflow. If you have a workflow that is a work in progress and you want your old subscribers to receive the new emails you add, you can put a time delay at the end of your workflow as a placeholder that says wait “1000 days,” for example, so your subscribers will wait there until you add more in the future.
Once you add more to your workflow, create another placeholder time delay at the end of your workflow and remove the original one you created.
Workflow analytics
You can view analytics for any email or workflow by clicking the bar graph icon. You can find it at the bottom of every workflow card or email. You can see all subscribers, active subscribers, those that are currently going through it, and those that have completed your workflow already.
Want to learn more about Flodesk? Make sure you read my review of Flodesk here.
Tell me… How are you using Flodesk workflows to automate your email marketing, nurture your subscribers, and turn them into clients?

Galen Mooney is the founder of Local Creative, a boutique web design studio crafting elevated websites for small business owners and creatives with a focus on connection, clarity, and growth. With over a decade of experience in design and SEO, she’s partnered with hundreds of creative brands to build custom Showit, Squarespace, and WordPress websites that build trust and momentum over time.

Hi!
Hi!
If I have a workflow for people who opt-in in one segment and then create a new “freebie” with op-in in another segment. How does it work if people who already are in the “first” segment? I don’t want to send emails like the “introduction newsletter” if they already got it when they signed up first time.
Thanks for a great article!
/My