
If you really want to streamline your inquiry process and track new clients with ease, the best way is to embed your Honeybook contact form onto your website. With both Squarespace or Showit, the process is super simple and quick, and it’ll save you tons of time in the long run.
Here’s how to get it done in less than ten minutes!
Why You Should Use Honeybook Forms on Your Website
If you already use Honeybook, you know how much time and energy it can save you when processing new inquiries and tracking projects. (If you don’t use it yet, click here for 50% off your first year!) By embedding your Honeybook form to your website, you can automate the inquiry process even further.
While you can create your inquiry form in Squarespace or Showit, their local forms don’t offer the same level of automation that a Honeybook form does. An embedded Honeybook form will…
- Create a new project automatically with the inquirer’s name and contact info.
- Capture other useful information, like referral source or project date.
- Categorize the project by type so you can send a “welcome” email specific to the type of support they’re looking for.
- Create a task in Honeybook so you know you need to look at the form and follow up with the potential client.
If you were to create a similar form on your website, you could still gather all this information, but it wouldn’t automatically upload to your CRM. By embedding your Honeybook form, you cut out the middle man and save yourself a headache!
How to Embed Your Honeybook Contact Form on Your Website
STEP 1: Create a Honeybook contact form.
In the Honeybook menu, go to TOOLS and click on CONTACT FORM. There, you’ll be able to create your default contact form for new inquiries.
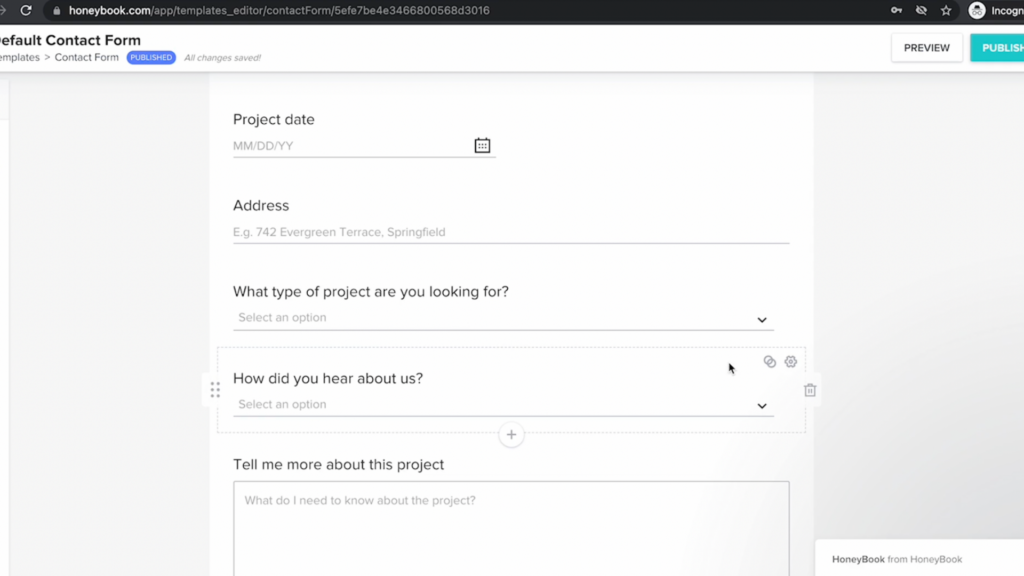
STEP 2: Customize your form.
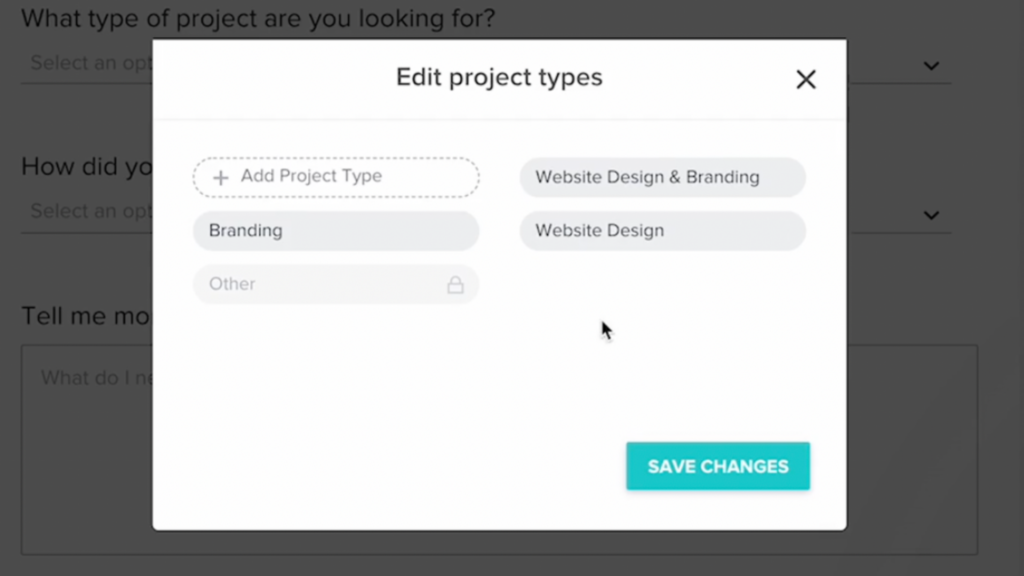
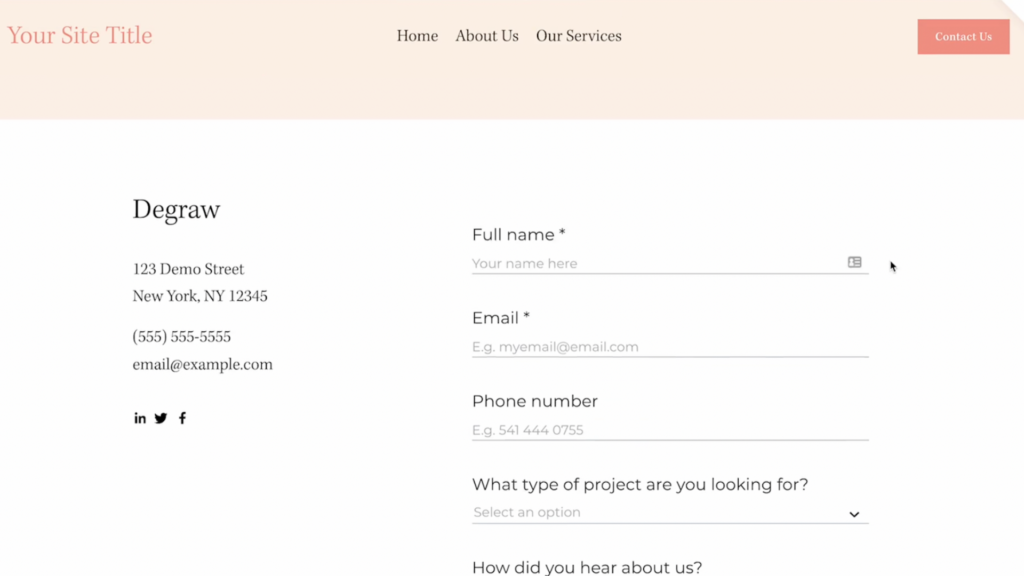
Next, customize your form to fit your tracking needs. Personally, I like to include name, email, phone number, project type, referral source, and an extra box at the end for the potential client to type any extra information I might need.
Unlike with a Squarespace or Showit form, your Honeybook form’s fields automatically connect to the new project. That means that if someone were to select the “Website Design” project type, they’re automatically labelled as a website design client and will automatically get the correct “welcome” email.
You can also customize the look of your form to fit your brand. Change the button color and text so it will look seamless when you embed it on your site.
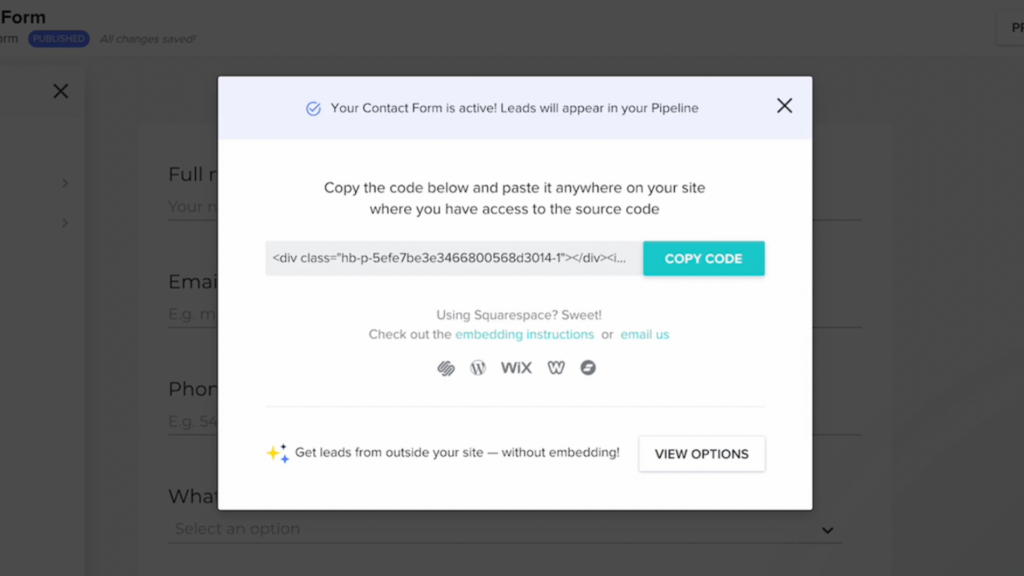
STEP 3: Copy the embed code.
Once you’re happy with your form, click PUBLISH. Honeybook will automatically generate an embed code, which you can copy with a single click!
STEP 4: Add it to your website!
Now that you’ve copied your code, let’s embed your Honeybook form into your website!
If you’re adding your HoneyBook form to Squarespace…
If you’re ready to get started with Squarespace now, click here to save 10% off your first subscription of a website by using the code PARTNER10.
Open or create the page where your contact form will live. Then, add an “embed/code” block. Code blocks are only accessible to professional Squarespace plans or above.
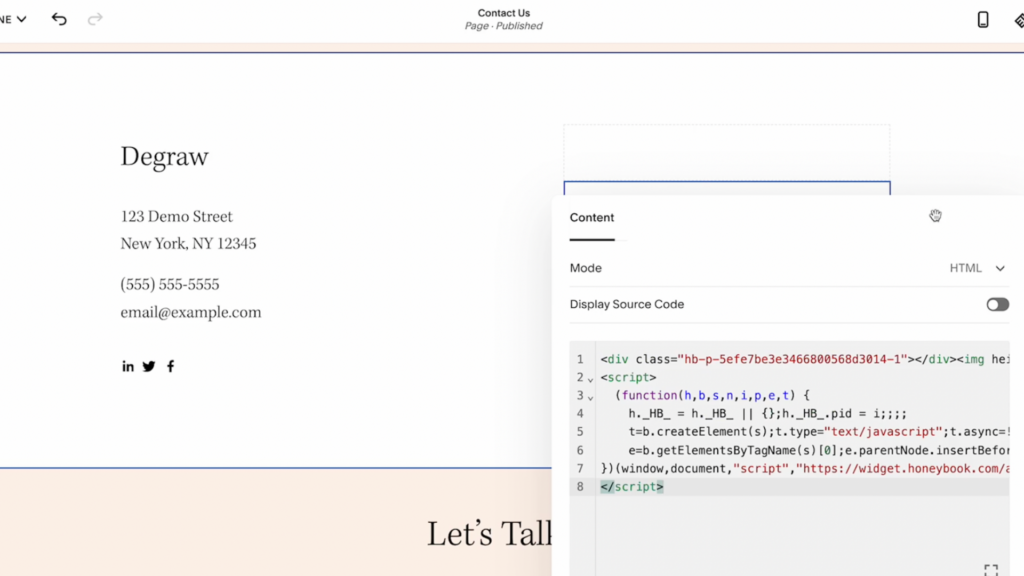
Paste the embed code from Honeybook into this block. In this editing view, you’ll probably see the text “Script Disabled” where your form is supposed to be. Simply click PREVIEW to see how your form will look to visitors.
When you’re happy with the look, click PUBLISH. And you’re done!
If you want to learn more about Squarespace, here’s our video all about Squarespace 7.1 and if you should make the switch.
If you’re embedding your HoneyBook form on Showit…
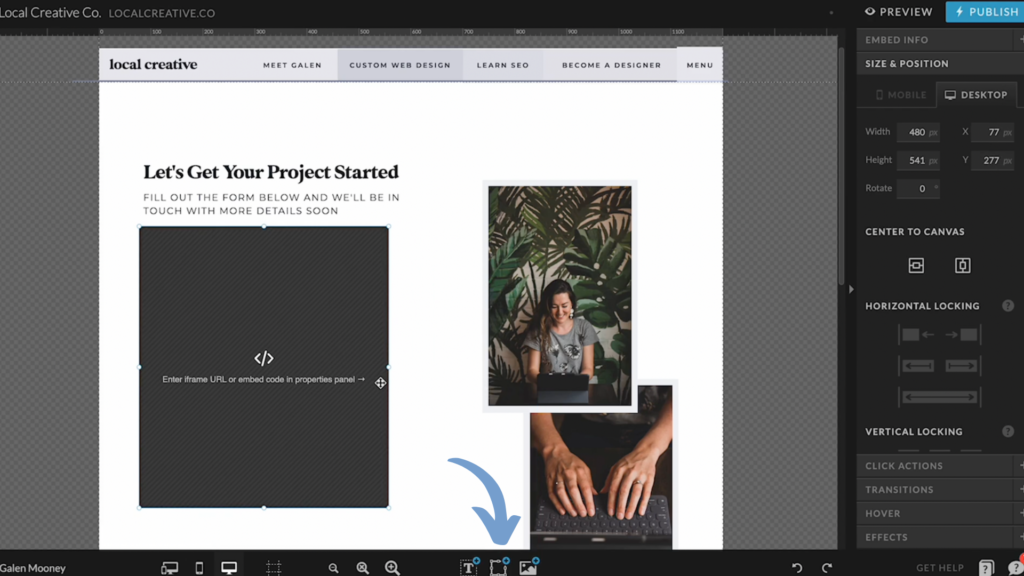
In your desktop editor, open or create the page where your contact form will live. click this button and select an “embed code” block.
Adjust the size and position of the block to fit your design, and then double-click to open the code block. Paste the Honeybook embed code, and then click PREVIEW to see how it’ll look on your site.
Because Showit allows you to create separate designs for your desktop and mobile site, you’ll now need to repeat these steps for the mobile view. Click the mobile view button, and rearrange your code block so it doesn’t overlap with any of your content.
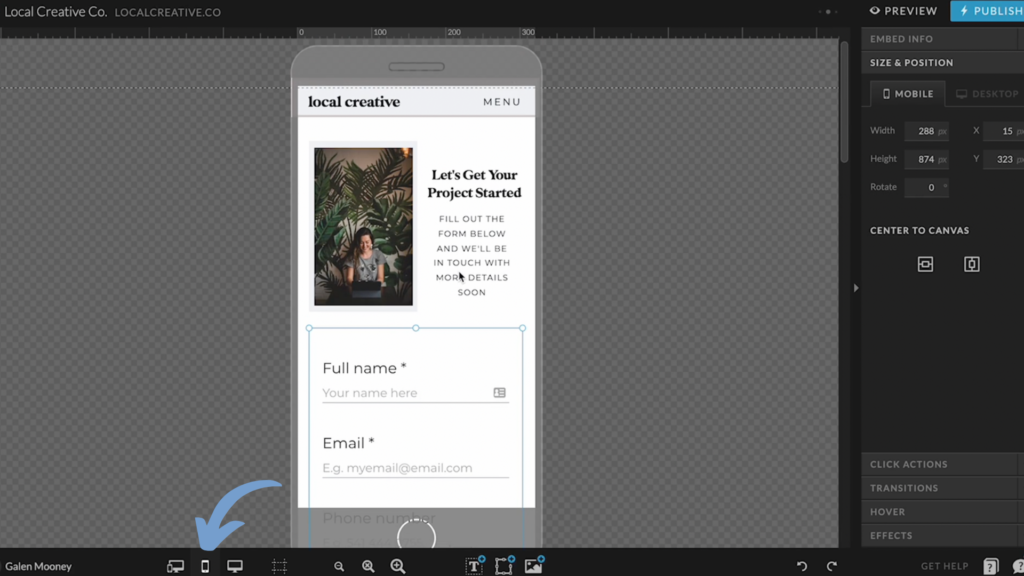
Next, click PREVIEW to see how it’ll look to visitors. When you’re happy with both versions of your site, click PUBLISH. And you’re done!
Looking to spruce up your website a bit? Check out our premium Showit website templates.
Let us know in the comments whether you’ll be setting up your HoneyBook form in Showit or Squarespace.
If you’re interested in trying out Showit, click here to get an extended one month free trial.
If you want to learn more about these two website platforms, click here to watch my video comparing Squarespace & Showit.

Galen Mooney is the founder of Local Creative, a boutique web design studio crafting elevated websites for small business owners and creatives with a focus on connection, clarity, and growth. With over a decade of experience in design and SEO, she’s partnered with hundreds of creative brands to build custom Showit, Squarespace, and WordPress websites that build trust and momentum over time.
