

If you’re new to web design or even if you’re a pro, Squarespace 7.1 is a great option to enhance your brand.
Squarespace is an all-in-one platform where you can drag and drop and easily click to add different elements to your site. This tutorial will help you get started building your first website on Squarespace 7.1
Although Squarespace 7.1 is still a work in progress and new features are being added, this update makes building a website even easier.
The biggest change in the new version of Squarespace is now you can create layered page sections, making it super easy to accomplish the equivalent of index pages in Squarespace 7.
If you’re ready to get started with Squarespace now, click here to save 10% off your first subscription of a website by using the code PARTNER10.
Choosing Your Template
If you have worked with Squarespace in the past, then you know when you choose a template you can customize it, but there were style rules and features unique to each template. If you were looking to add a specific blog layout to your site, for example, (that was not available in your current template) you would’ve had to switch templates to access those features.
In Squarespace 7.1, the template you choose is a starting point and you will never have the option nor need to switch because every template has access to the same design functionality and features.
Switching from Squarespace 7 to Squarespace 7.1
One downside of switching from Squarespace 7 to 7.1 is that there is no way to upgrade an existing site. Meaning you have to start from scratch, but there are tools available to make the switch easier. If you want to learn more, you can check out this post:
How to make the switch from Squarespace 7 to Squarespace 7.1.
Page Structure/Layouts
The way you add and edit pages has stayed the same from Squarespace 7 to 7.1, but there are some new features available that you should know about.
Page layouts are now more flexible than ever! You are able to add more content using page sections that stack on top of one another. Additionally, all sites have customizable header and footer options and you can extend the footer by adding multiple sections.
Banner images can now be added to any page by adding a new section with a background image. By clicking the pencil icon, you can now edit sections specifically, (this overrides the global site style we will talk about later).
You can also change the background and text color of each individual page section, which means you can have multiple styles assigned to a single page.
In the past, if you wanted to change font colors from one section to the next, you would have to write custom CSS. This was a huge limitation that is now fixed because each section can have its own set of styles.
Setting Up Your Site Navigation
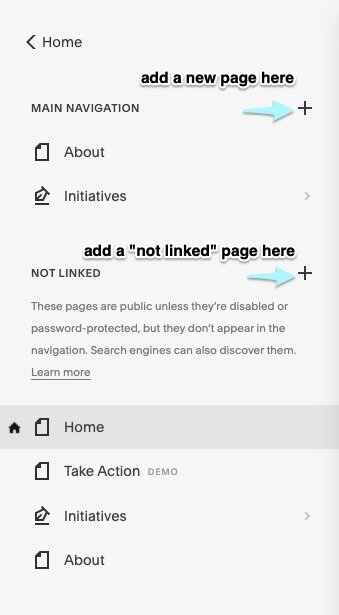
Adding a new page to the main navigation under “Pages” in Squarespace will add it to your navigation bar on the top of your site. You can also add a page to the “not linked” section so that doesn’t appear in navigation at the top of your site (but it will still be accessible to site visitors and indexed in Google unless you hide the page under “SEO” in the settings section for that specific page)
A portfolio page is a landing page that can link users to sub-pages or galleries. A great way to show off your work and go into detail about past projects.
In Squarespace, you can also add folders to your navigation, which will create a dropdown menu for your navigation. The empty folder will then appear in the pages panel. You can add any page to a folder which lets you combine multiple navigation items under one main section.
Styling Your Site
Mentioned previously, you can stylize and edit specific sections of your site and this will override the “global” site style. Global style options are easily adjustable using the “design” tab where you can change fonts, colors, spacing, buttons, product items, image blocks, etc.
After you setup your global styles, you can choose from these styles when editing an individual page section. Each section of your page can have different styles (colors, fonts, backgrounds, etc.)
Squarespace 7.1 has a newly-added H4 option for headings, meaning you can now use a smaller heading and not overuse the larger ones.
You can also use section styles to add background images. Simply click “background” and upload your image or video.
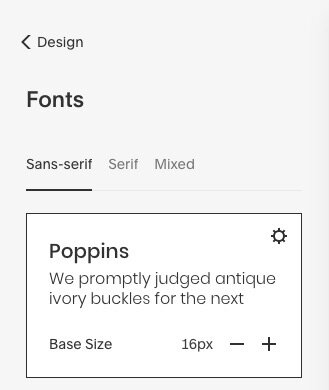
To select your website fonts, follow these steps:
- From the home page, click the “design” tab from the menu on the left
- From there, you will be brought to your global site styles overview, click “fonts”
- You will now see the display shown here, choose between san serif, serif, or mixed and find the best font to enhance your brand!
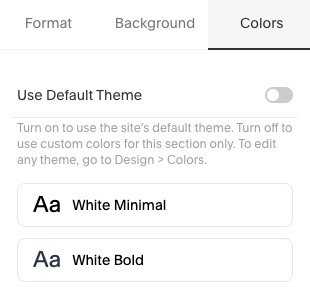
Follow these steps to change the font style for a specific section on your site:
- Click “EDIT” on the top of a particular page
- Choose which section you’d like to edit and click on the pencil icon
- You will be brought to the pop up menu shown here, click “colors”
- Play around and choose which font style you like the most!
Adding your social sharing logo image
If you’re unfamiliar with what a social sharing logo is, this is the thumbnail image that appears when someone shares anything from your site on social media. In the home menu click “design” and then “social sharing” and simply click the arrow to upload an image.
This is your default sharing logo, you can also add a unique social sharing image for each page.
Adding a browser icon or favicon
A browser icon or favicon is the small image that displays next to the browser tabs. Using Squarespace there is a default favicon of a gray cube. Having a branded favicon will make your site feel more custom.
To add a favicon to your site from the home menu, click “design” and then “browser icon.” Then drag your image to the uploader. After you upload the image, remember to click “save” to have your icon show up (it make take a while for the changes to go live).
Adding Content
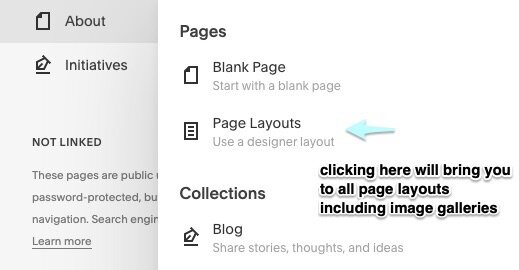
In Squarespace, you can either choose a pre-built page or create a blank page and fill it with your own content.
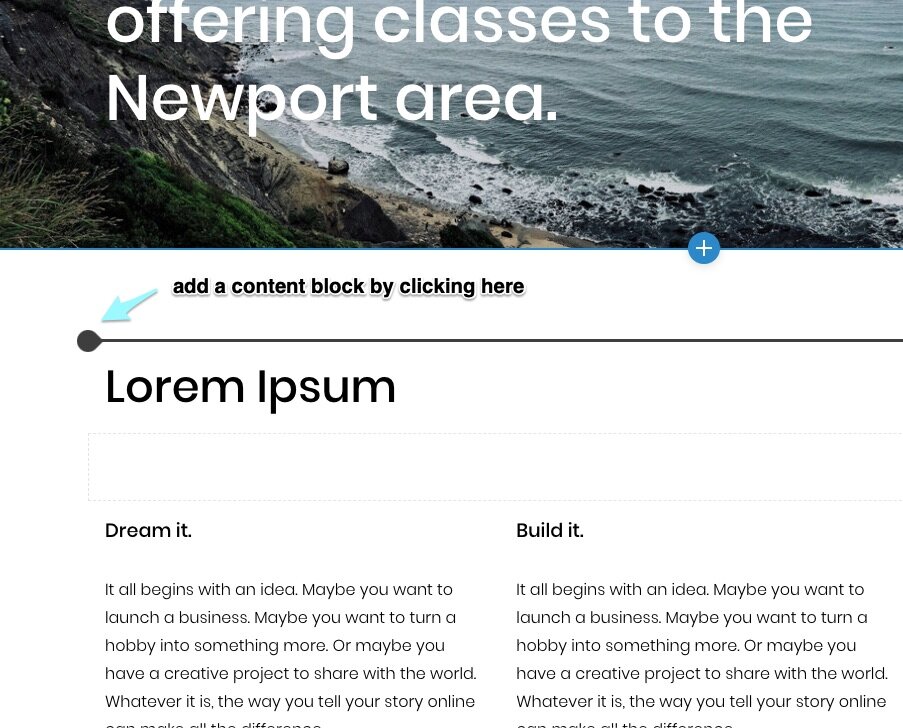
When to use a page section vs. a block
In Squarespace, you can either add content to an existing section by adding a new block or add a new page section altogether. When adding a new page section there are many templates to choose from including gallery sections, lists, etc.
You can use page sections to create a unique layout for your site. You can change the section height, content width, and content alignment within your section. You can also add background images and videos and add custom colors to that section only. There are three types of page sections which you can find more info about below.
If the background and styles are the same, add a new block to an existing section. If you want to change the background and font styles or colors, add a new section instead.
Galleries must always be added in their own section.
Adding Blocks to Squarespace
Block can be used to add different content elements to your site. There are some simple blocks you can add i.e. text or code and there are more complex ones like acuity scheduling or maps. Blocks can easily be rearranged, edited, and deleted.
Gallery sections
Instead of adding multiple image blocks you can add a gallery section. There are eight different layouts available to choose from allowing you to customize the way your gallery appears.
Gallery blocks are no longer available in Squarespace 7.1, but Gallery sections have replaced them!
Collection page sections
Collection page sections are used to display multiple pages/posts in one place. This could be something like blog posts, events, portfolios, and product displays.
Adding Images
The gallery block is now gone, but you can add a gallery section to an existing page, meaning you are able to add content above or below the section (which makes your gallery pages much more SEO-friendly).
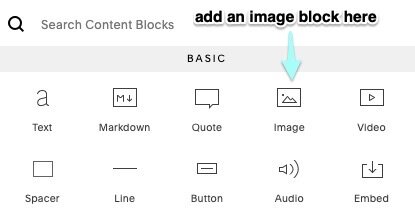
The image layouts available in Squarespace
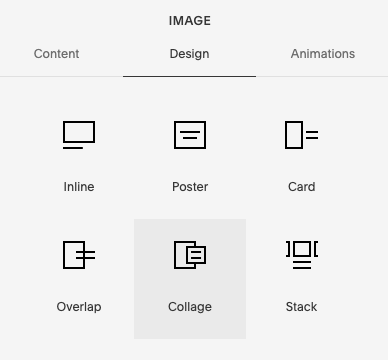
Don’t worry, you can still add single image blocks in Squarespace. There are different layouts available for the images you add including inline, poster, card, overlap, collage and stack.
You can also animate these image blocks and those animations include fade in, slide up, tilt up and down, and a few custom options as well.
You can style your image blocks in the main design settings. I found that I had to use a little custom CSS to get my image blocks to look the way I wanted when adding text overlays.
Adding Image Galleries
Adding an image gallery to your site allows you to display multiple images without adding individual image blocks. There are five layouts to choose from when adding a gallery section.
Some display all the images at once and others you can click through like a slideshow.
Adding a Contact Form
Adding a contact form to your site is beneficial because you can avoid spam, boost your email list, get important customer information, and it helps you keep track of messages. To add a contact form, add a page using the + icon from the home menu and select “contact” from the page layout options.
You can also embed third party contact forms from HoneyBook, Dubsado, or any other client management system.
Adding Third Party Code to Squarespace
You can add third party code to Squarespace using the code block. You can also add custom code and scripts using code injection which is only available in business and commerce plans. Code injection is in advanced settings and this is where you can add site features like live chat or a Facebook ads pixel.
You can add code within a page, in the header/footer for a single page, or in the header/footer for the entire site.
One example of third party code that can be helpful is Flodesk. Adding a Flodesk popup to your Squarespace website can help you grow your email list faster.
Read my review of Flodesk here.
Squarespace Analytics
Squarespace has its own analytics feature where you can track how your site is doing from reports on your page views, conversion, sales, referrers, and popular content. If your site features its own store your analytics will include revenue, conversion, and cart abandonment.
In the home menu you can click “analytics” to see your reports. Some of the features are only available for certain paid plans. You can find out what analytics your site offers here.
Integrating with Google Analytics
If you’re new to the website-building world, you will want to learn more about Google Analytics. Google Analytics helps you track many aspects of your site and it is also 100% free to use.
You can see what kind of content brings the most traffic to your website and where your visitors are coming from. To integrate Google Analytics with your Squarespace site you will need your Google Analytics tracking ID.
You can find your tracking ID in the property settings page of your Google Analytics account.
How to integrate Google Analytics with your Squarespace site:
- From the home menu of Squarespace click “settings” and then “advanced”
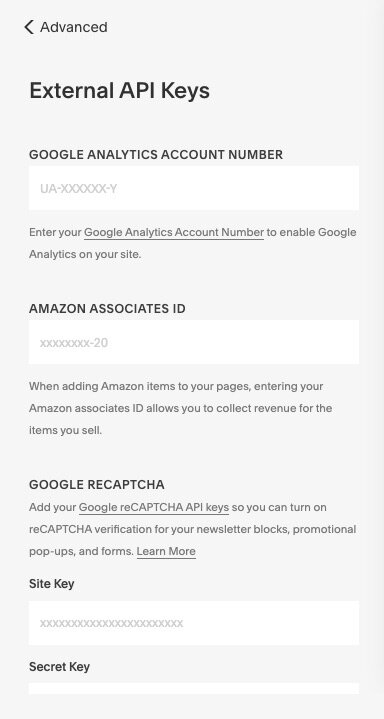
- Once in the advanced menu, click “external API keys”
- There will be a Google Analytics Account Number field and there you will input your information
To find your Google Analytics tracking ID you can follow Google’s specific instructions here.
Setting Up Your Domain
Squarespace offers one free domain for yearly subscriptions, the domain is free for one year from when it is registered. If you’re not a yearly Squarespace subscriber, you can purchase a domain or if you would like an additional domain they are available for purchase for about $20 per year. If you have a domain already purchased from a third-party provider Squarespace has specific tutorials for each one.
Right now, Squarespace is also offering a year of Gsuite email for free with all annual subscriptions. That means you get a free custom email like you@yourdomain.com.
Squarespace SEO
Squarespace can be great for SEO as long as you know the right way to optimize your website.
Some general suggestions to better optimize your site include having a descriptive site title, adding a unique title and meta description to all pages, making sure your location is clearly listed, turning on your SSL certificate, and customizing your image file names and alt text.
If you’re looking to improve your SEO with Squarespace, hop on the waitlist for our signature course, Creative SEO.
You can also join our Facebook group for weekly live videos to help you get started in the meantime.
How to publish a site on Squarespace
Before you launch your new Squarespace site, there are a few things you should know.
Make sure you turn on your SSL certificate. In the advanced settings, you can find your SSL certificate status. Make sure it says active! You can change your security preference under these settings.
Secondly, make sure your page URLs are setup correctly and any content from your old website is mapped properly if you are moving over to Squarespace from another website.
Double check your SEO settings – hide any pages from search engines that you don’t want to rank and check your buttons/links to make sure they are connected properly.
Remove any passwords from your website and make sure your domain is connected properly.
Check both the www.yourwebsite.com and the yourwebsite.com version of your site to make sure they are loading correctly.
Add your billing info under “settings”, choose your Squarespace hosting plan, and you’re ready to go live!
What’s been your experience with Squarespace 7.1?
This site was recently redesigned on Squarespace 7.1 and the process was fairly easy and straightforward. I don’t think I could go back to Squarespace 7 now that I’ve gotten used to all of the new features and functionality.
What’s been your experience with Squarespace 7.1 so far?

Galen Mooney is the founder of Local Creative, a boutique web design studio crafting elevated websites for small business owners and creatives with a focus on connection, clarity, and growth. With over a decade of experience in design and SEO, she’s partnered with hundreds of creative brands to build custom Showit, Squarespace, and WordPress websites that build trust and momentum over time.
